Orienteering mapping on Mac: Creating a base map!
31 oktober 2014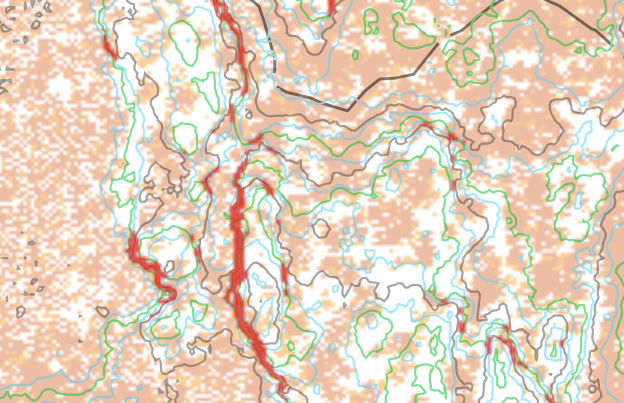
This is a tutorial of how to use a Mac for making a base map, based on LAS files, to be used when surveying orienteering maps preferably in Open Orienteering Mapper.
First of all you need some tools: GDAL, NumPy and libLAS. In order to be able to install libLAS you also need to install Homebrew first.
So lets start from scratch!
1. Download GDAL Complete from Kyngchaos.com and install both GDAL and NumPy in the package.
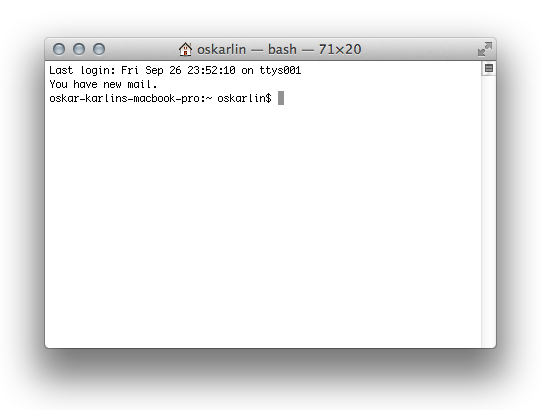
2. Start up the Terminal (you’ll find it in Applications/Utilities. It will look something like this:
3. Install Homebrew by following the instructions on the bottom of their website (IE copying a line of code and paste it in the terminal, hit enter).
4. Type brew install liblas in the Terminal and hit enter.
6. Extract the files and put the files las2oom.sh, objhojd.txt and slope_branter.txt in the same directory as your LAS file that you will create a base map from.
Now you’re done installing! Let’s do some base maps!
1. Go to the Terminal again. Navigate to where your LAS file in the terminal. One simple way is to first type cd and then drag and drop the folder from Finder into the Terminal window. Hit enter.
2. Type sh las2oom.sh lasfilename.las yourAreaName equidistance xmin xmax ymin ymax. Well don’t type exactly this. lasfilename.las should be the name of your LAS-file, yourAreaName should be the name you want to give this area you will make base map over, maybe myforest. Equidistance should either be the values 2.5 or 5. xmin is the western most X-coordinate (in the LAS-files coordinate system) of your area, xmax is the eastern most, etc.
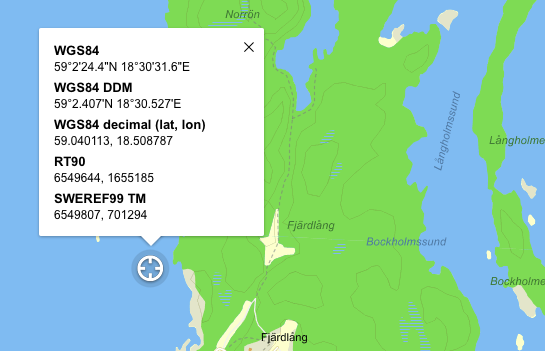
Note: If you live in Sweden, one good source to get coordinates in the right coordinate system is to use Eniro kartor. Click on the GPS button in the lower right area and then first zoom in to the most western part of your area and move the cursor there. Copy the x coordinate below Sweref99 TM (which is the shorter of the two, 6 digits), this is the xmin and then pan to the eastern part of your area and copy that x coordinate (xmax). Do the same with southern and northern part of your area for the y coordinates.
Then hit Enter! And wait…
3. If everything went OK you will now end up with a couple of files. The files you will be using in Open Orienteering Mapper are a couple of DXF files and some TIF images.
4. Start Open Orienteering Mapper and create a new project. Choose which scale you are going to use and then a symbol set and then Create.
5. Import one of the TIF images (yourname.obj.orange.tif) as a background template. Now it could get somewhat tricky! Fist you make sure you have selected Georeferenced (World file), then hit Open. Then you need to choose coordinate system. In order to do that you have to enter the proj.4 specification of your coordinate system. So choose ”from proj.4 specification”. Another box appears and here you should paste the specification. Sweref99 TM has the EPSG code 3006 and its proj4-specs can be found here. Click on Proj4 link and then copy the text (also shown below).
+proj=utm +zone=33 +ellps=GRS80 +towgs84=0,0,0,0,0,0,0 +units=m +no_defs
This line of text you paste into CRS specification box. Make sure the ”On CRS changes, keep” button is ticked on ”projected coordinates”. Then to get the real magnetic north to be up on your map, click the ”look up..” button under Map north. This will rotate the map slightly.
Press OK and then when you select the coordinate system for the image (world file), click on ”same as map’s” and then OK again.
6. Next step is to import the next TIF. Now you don’t need to enter any coordinate system information, just hit OK.
7. Contours time! Import the contours one at a time and give it a symbol for each contour line (0.625 m, 1.250 etc).
8. YOU ARE DONE!
PS. normally I print out the surveying map with 50% opacity of the object image.